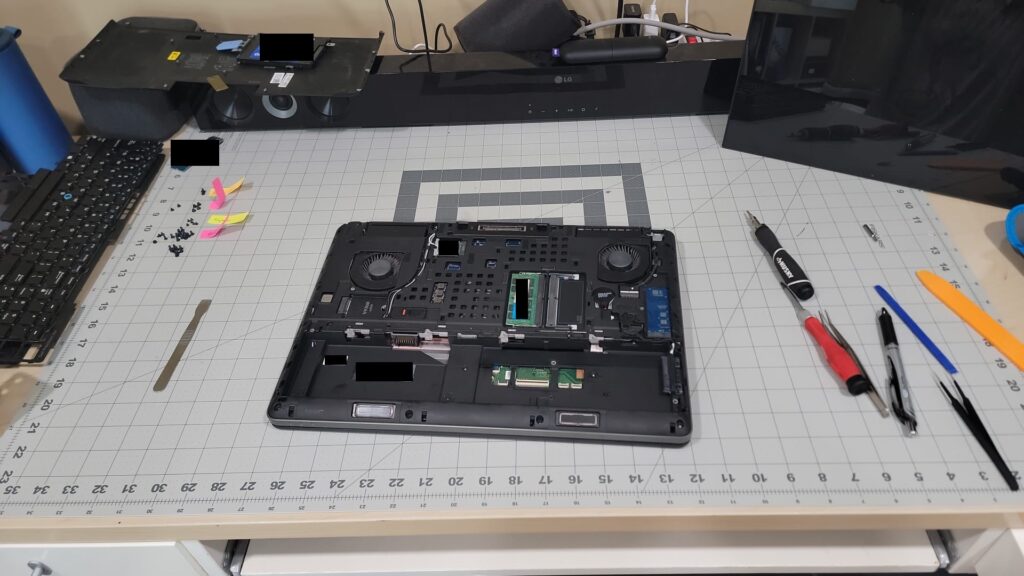
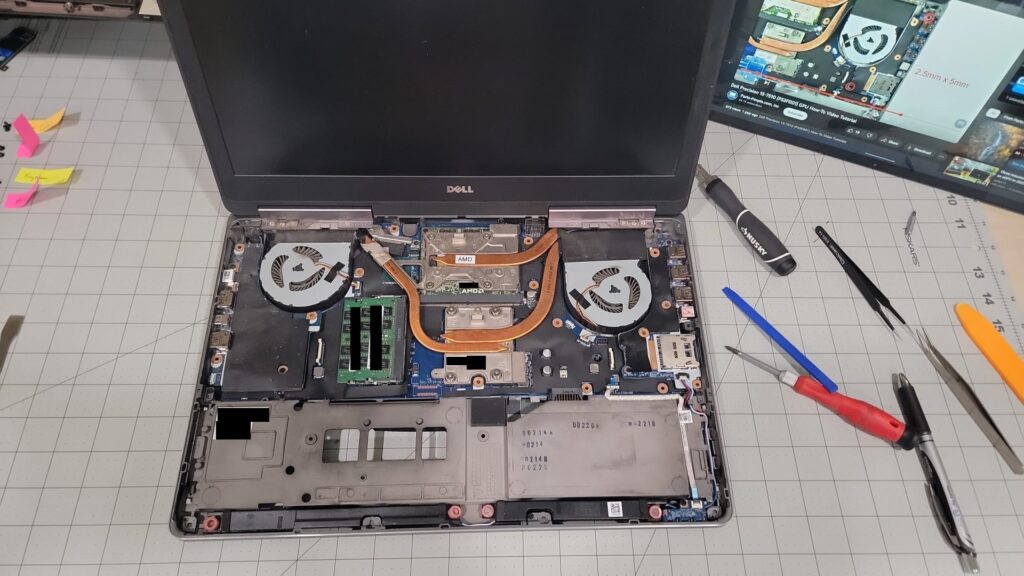
As I mentioned in my previous post, I ran into what I believe are some GPU issues with my Dell 7510. So, like any self-respecting nerd (is that an oxymoron?), I ordered a replacement part from parts-people.com and got to work.
Prep Work
As with most things these days, you can almost always find some instructions on the internet. I found a tutorial from UFixTek on YouTube that covers a full cleanup and re-paste. The only additional step in my repair was to replace the GPU with a new one.
With that, I setup a workstation and got to it. Over the past few years I have acquired some tools that make this type of work super helpful:
- Precision Screwdriver Set – I have an older version of this Husky set. I cannot tell you how many times it’s saved me when doing small electronics work.
- Pry Tool Set – I ordered this set about 4 years ago, but it hasn’t changed much. The rollup case is nice.
- Small Slotted screwdriver – The Husky set is great, but for screws that are deep set, sometimes you need a standard screwdriver. I honestly don’t remember where I got mine, it’s the red handled one in the photos below.
- Exact-o Knife – Always handy.
- Cutting/Work mat – I currently use a Fiskars cutting mat from Michaels. It protects the desktop and the piece, and the grid patter is nice for parts organization.
- Compressed Air Duster – I LOVE this thing. I use it for any number of electronics cleaning tasks, including my keyboard. It’s also powerful enough to use as an inflator tool for small inflatables.
- Rubbing alcohol for cleaning
- Lint free paper towels
- new GPU
- Thermal Paste
Teardown
Following the tutorial, I started disassembly, being careful to organize the screws as I went along. I used a few small Post-It tags to label the screws in case I forgot. I removed the M.2 drive, although, in retrospect, I do not think it was necessary.

Laptops have pretty tight tolerances and a number of ribbon cables to connect everything together. The tutorial breaks down where they are, but it’s important to keep those in mind as you tear down. If you miss disconnecting one, you run the risk of tearing it.

Clean up!
Once I got down to the heatsink assembly, I removed it (and the fans) from the laptop. I gave it the same scrubbing as shown in the tutorial, except I did not have to clean my old GPU since I was installing a new one. I cannot tell you how much thermal paste was on this. It was obscene.
I took care to really clean out the fan assemblies, including the fins. There was about 5 years of dust built up in there, and there was a noticeable reduction in airflow. I’m sure this didn’t help my thermal issues.
Re-paste and Re-assemble!
With everything sufficiently cleaned up and blown out, I applied an appropriate amount of thermal paste to the GPU and CPU, put the heatsink assembly back, and reversed the process to re-assemble. Again, it’s important to make note of all the connections: missing a ribbon cable or connection here will lead to unnecessary disassembly just to get it hooked back up.
And now, we test…
“But does it work?” There’s only one way to find out. I turned it back on, and, well, the screen came up, so that is a victory. Although, there is an integrated graphics chip… so maybe not as big a victory as I would anticipate.
Windows 10 booted fine, and before I plugged in additional displays, I check device manager. The card was detected and stated it was functioning correctly. I plugged in my external displays (one HDMI, one mini DisplayPort -> HDMI), and they detected normally and switched over.
I fired up FurMark to run some GPU tests and see if the new AMD works. Now, I had used FurMark on the old GPU and was unable to lock up my laptop like Fusion 360 was doing. So, running FurMark again is not a sure test, but worth running anyway.
One thing I immediately noticed is that FurMark was reporting GPU temperatures, something that was not happening with my old GPU. That’s a good sign, right? After letting FurMark run the stress test for a while, I figured it was time to fire up Fusion 360 and try to hang my laptop.
As with FurMark, Fusion 360 didn’t always hang the laptop. There was no one action that caused it, although, orbiting objects quickly seemed to be a trigger that caused problems more often than not. So I opened a few images and orbited them. No issues.
Victory?
I hesitate to declare total victory here: the GPU issue was not consistent, which means all I really know is I am back to where I started. Without some “time under tension,” I’m going to be very wary as I dig into modeling and make sure I save often. But there is promise that the change was for the better. If nothing else, the laptop got a good cleaning that it desperately needed.