Tag: Network

  • Network Hops, Reverse Proxies, and Why Your Edge Service Should Actually Be at the Edge

    Network Hops, Reverse Proxies, and Why Your Edge Service Should Actually Be at the Edge

    After migrating my Proxmox hosts and the first Kubernetes cluster to their proper VLANs, I took a moment to appreciate my newly segmented network. Everything was isolated. Firewall policies were working. Life was good.

    Then I looked at my network topology diagram and had a realization: my reverse proxy was in completely the wrong place.

    The Current Setup

    My reverse proxy (m5proxy, running nginx) handles all external HTTP/HTTPS traffic coming into my network. It’s the front door for everything—from my personal website to various services I self-host.

    Its current location:

    • Physical location: Connected to ProCurve switch, Port 23
    • VLAN membership: VLAN 60 (Services)
    • Purpose: Reverse proxy to services on VLAN 50 (K8s) and VLAN 60 (other services)

    Now, let’s trace the network path for an external request to a Kubernetes service on VLAN 50:

    Internet  UCG Max (gateway) → ProCurve switch (Port 23) → m5proxy → ProCurve switch → UCG Max (inter-VLAN routing to VLAN 50) → ProCurve switch (Ports 13-16, bonded to pxhp) → Kubernetes VM

    Count those hops: 6 total (3 switch hops, 3 routing decisions).

    For every. Single. Request.

    The Question

    Why is my reverse proxy sitting behind the ProCurve switch when it’s handling traffic from the internet?

    The UCG Max is my gateway. It’s where external traffic enters my network. So why was I routing that traffic to the ProCurve switch just to hit the reverse proxy, which then routes back through the switch to reach its destination?

    Because I’d never questioned it. The ProCurve switch had available ports. The reverse proxy needed a port. Done.

    The Better Way

    The UCG Max has LAN ports. Physical ethernet ports that I can configure for specific VLANs.

    What if I connected m5proxy directly to the UCG Max?

    New network path:

    Internet  UCG Max (m5proxy directly connected) → ProCurve switch (Ports 13-16) → Kubernetes VM

    Count those hops: 3 total (1 switch hop, 2 routing decisions).

    50% reduction in network hops for every external request.

    The Architecture Argument

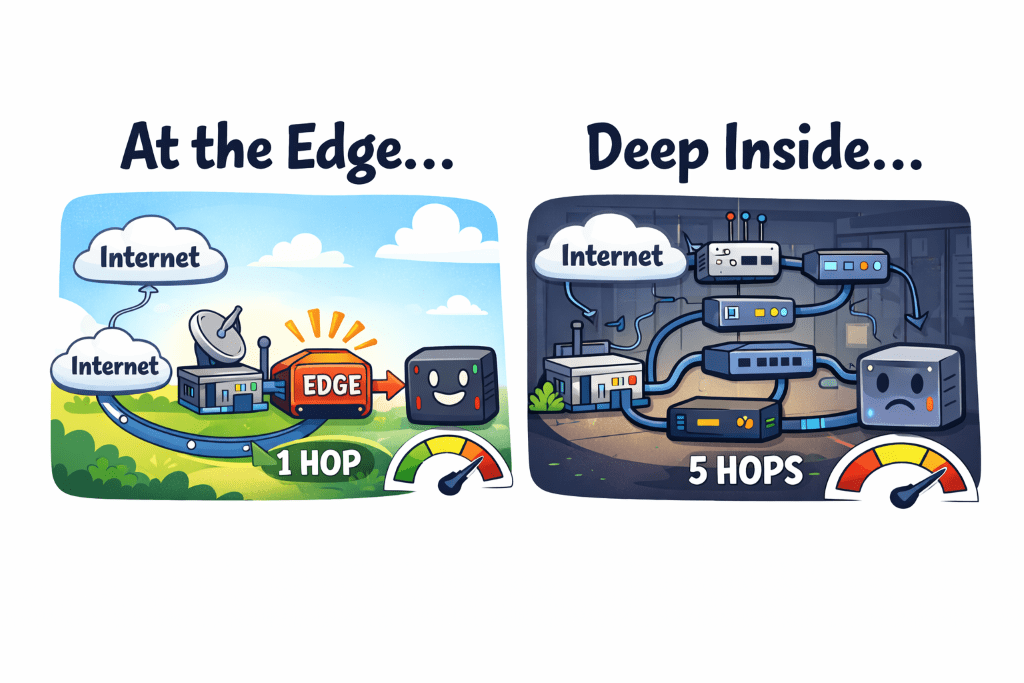
    Beyond the performance improvement, there’s an architectural argument: edge services belong at the network edge.

    My reverse proxy is the entry point for all external traffic. It’s literally the edge of my internal network from an external perspective. So why was it sitting behind a switch, requiring traffic to traverse my internal infrastructure just to reach it?

    It should be as close to the gateway as possible. Which means: directly connected to the UCG Max.

    The Configuration

    This turned out to be surprisingly straightforward:

    Step 1: Configure a UCG Max LAN port for VLAN 60 (Services)

    • Via UniFi Controller → Port Management
    • Set port profile to VLAN 60
    • Configure as access port (not trunk—m5proxy only needs VLAN 60)

    Step 2: Physical cable move

    • Unplug ethernet cable from ProCurve Port 23
    • Plug into configured UCG Max port
    • Wait for link to come up (~10 seconds)

    Step 3: Verify connectivity

    • SSH to m5proxy: ssh root@m5proxy
    • Test gateway: ping 192.168.60.1 (UCG Max)
    • Test cross-VLAN: ping 192.168.50.x (K8s nodes)
    • Test external: ping 8.8.8.8

    Step 4: Test reverse proxy functionality

    • From external network: curl -I https://mattgerega.com
    • Verify proxied requests work correctly
    • Check nginx logs for successful forwards

    Total downtime: Maybe 2-3 minutes while the cable was being moved.

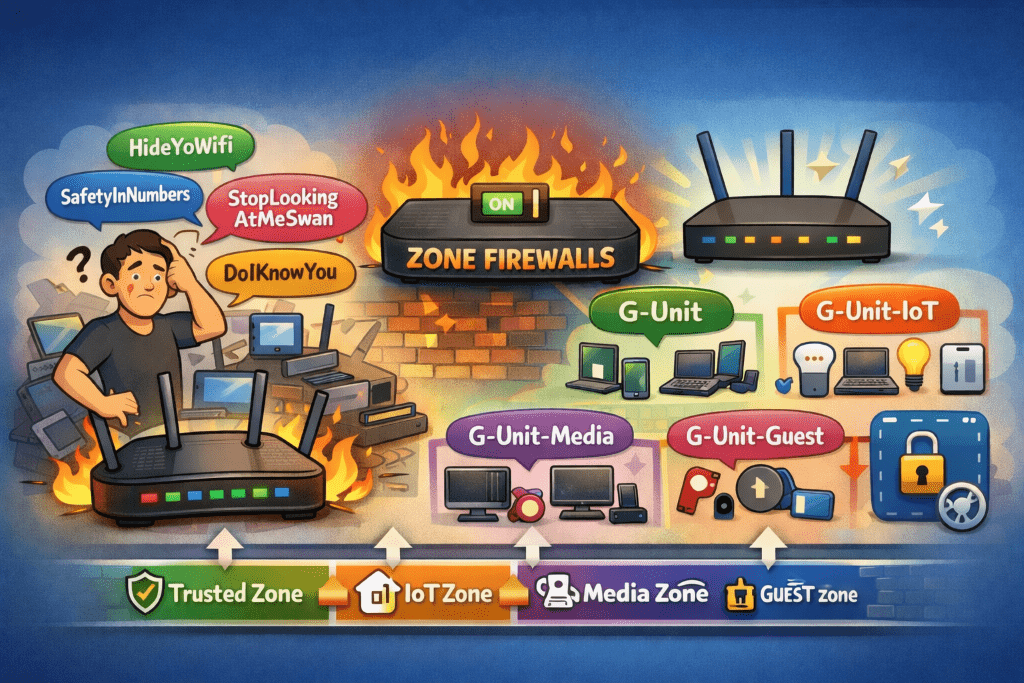
    The Firewall Consideration

    One thing to verify: m5proxy on VLAN 60 needs to be able to forward requests to services on VLAN 50 (K8s). That requires a firewall rule:

    Services (VLAN 60) → Lab (VLAN 50): Allow

    This rule should already exist if you’ve properly configured zone-based firewalls. But it’s worth double-checking before you move the proxy, because if that rule is missing, your external traffic will hit the proxy and then… nowhere.

    Quick test from m5proxy before the move:

    # Can the proxy reach K8s services?
    
    curl -I http://192.168.50.x:port

    If that works, the firewall rules are correct.

    The Results

    After the move:

    • External requests are noticeably snappier (hard to measure precisely, but the difference is perceivable)
    • Network topology is cleaner—edge service at the network edge
    • ProCurve Port 23 is now free for other devices
    • Traffic patterns make more logical sense

    And the best part: everything still works. No broken services. No mysterious connectivity issues. Just cleaner architecture and better performance.

    When NOT to Do This

    Fair question: why doesn’t everyone do this?

    Reason 1: If your reverse proxy needs to be on multiple VLANs, you’d need a trunk port on the UCG Max. That’s more complex than a simple access port configuration.

    Reason 2: If your reverse proxy is a VM instead of a physical device, it makes sense for it to live wherever your hypervisor is. Don’t complicate your VM networking just to save a hop.

    Reason 3: If your gateway has limited ports and they’re all in use, you don’t have a choice.

    In my case: m5proxy is a physical device, it only needs VLAN 60 membership (forwarding to other VLANs happens via routing), and the UCG Max had available ports. Perfect use case.

    What I Learned

    1. Question your topology. Just because something works doesn’t mean it’s optimal. I’d been routing traffic through unnecessary hops for no good reason.
    2. Edge services belong at the edge. If something handles external traffic, put it as close to your gateway as possible.
    3. Port availability matters. Having available ports on your gateway opens up architectural options you might not have considered.
    4. Testing is cheap, fixing is expensive. Spend 5 minutes verifying firewall rules and connectivity before you move cables, not after.
    5. Physical changes are faster than you think. I spent more time planning this move than executing it. The actual cable swap took maybe 60 seconds.

    Part 4 of the home network rebuild series. Read Part 3: Proxmox, VLANs, and the Bridge That Wasn’t

  • Proxmox, VLANs, and the Bridge Configuration That Almost Broke Me

    Proxmox, VLANs, and the Bridge Configuration That Almost Broke Me

    After successfully migrating 44 wireless devices to proper VLANs, I felt pretty good about myself.

    • Wireless segmentation: ✅
    • Zone-based firewalls: ✅

    Time to tackle the infrastructure, right? Well, Proxmox had other plans.

    The Plan

    I have two Proxmox hosts running my homelab:

    • pmxdell: A Dell laptop with one VM (Azure DevOps agent)
    • pxhp: An HP ProLiant with 17 VMs (three Kubernetes clusters)

    The goal was simple:

    1. Move Proxmox management interfaces to VLAN 60 (Services)
    2. Move VMs to VLAN 50 (Lab)
    3. Celebrate victory

    The execution? Well, let’s just say I learned some things about Linux bridge VLANs that the documentation doesn’t emphasize enough.

    Day 1: pmxdell and False Confidence

    I started with pmxdell because it was the simpler host—just one VM to worry about. I configured a VLAN-aware bridge, added the management IP on VLAN 60, and restarted networking.

    Everything worked. pmxdell came back up on 192.168.60.11. SSH worked. The Proxmox web interface was accessible. I was a networking wizard.

    Then I tried to migrate the VM to VLAN 50.

    qm set 30000 --net0 virtio,bridge=vmbr0,tag=50
    
    qm start 30000

    The VM started. It got… no IP address. DHCP requests disappeared into the void. The VM had no network connectivity whatsoever.

    The Investigation

    My first thought: firewall issue. But the firewall rules were correct—LAB zone could access WAN for DHCP.

    Second thought: DHCP server problem. But other devices on VLAN 50 worked fine.

    Third thought: Maybe I need to restart the VM differently? I stopped it, started it, rebooted it, sacrificed it to the networking gods. Nothing.

    Then I ran bridge vlan show:

    port              vlan-id
    enp0s31f6         1 PVID Egress Untagged
                      50
                      60
    vmbr0             1 PVID Egress Untagged
                      60

    See the problem? VLAN 50 is on the physical interface (enp0s31f6), but not on the bridge device itself (vmbr0). The tap interface for the VM had nowhere to attach to.

    The “bridge-vids” Revelation

    My /etc/network/interfaces configuration looked like this:

    auto vmbr0
    
    iface vmbr0 inet manual
        bridge-ports enp0s31f6
        bridge-stp off
        bridge-fd 0
        bridge-vlan-aware yes
        bridge-vids 1 50 60

    I had assumed—like a reasonable person who reads documentation—that `bridge-vids 1 50 60` would add those VLANs to the entire bridge configuration.

    Wrong.

    bridge-vids only applies VLANs to the bridge ports (the physical interface). It doesn’t touch the bridge device itself. The bridge device needs VLANs added explicitly.

    Why does this matter? Because when Proxmox creates a tap interface for a VM with a VLAN tag, it needs to add that tap interface as a member of that VLAN *on the bridge device*. If the bridge device doesn’t have that VLAN, the tap interface can’t join it.

    VLAN 1 works automatically because it’s the default PVID on bridge devices. Any other VLAN? You have to add it manually.

    The Fix

    The solution was adding explicit post-up commands:

    auto vmbr0
    
    iface vmbr0 inet manual
        bridge-ports enp0s31f6
        bridge-stp off
        bridge-fd 0
        bridge-vlan-aware yes
        bridge-vids 1 50 60
        post-up bridge vlan add dev vmbr0 vid 50 self
        post-up bridge vlan add dev vmbr0 vid 60 self

    Applied the changes, stopped the VM, started it again (not restart—stop then start), and suddenly: DHCP lease acquired. VM online. Victory.

    Day 2: pxhp and the Networking Service Trap

    Armed with my new knowledge, I confidently configured pxhp. Four NICs bonded in LACP, VLAN-aware bridge, proper `post-up` commands. I even remembered to configure the bridge with VLAN 50 support from the start.

    Then I made a critical mistake: I ran systemctl restart networking.

    All 17 VMs instantly lost network connectivity.

    Why Restarting Networking is Evil

    When you run systemctl restart networking on a Proxmox host:

    1. The bridge goes down
    2. All tap interfaces are removed
    3. All VMs lose their network connection
    4. The bridge comes back up
    5. The tap interfaces… don’t automatically recreate

    Your VMs are now running but completely isolated from the network. You have to stop and start each VM to recreate its tap inte4rface.

    The Better Approach: Shutdown VMs first, then restart networking. Or just reboot the entire host and let the VMs come back up automatically with proper tap interfaces.

    I learned this the hard way when I had to stop and start 17 VMs manually. In the middle of the migration. With production workloads running.

    Day 3: Kubernetes and the Blue-Green Migration

    With both Proxmox hosts properly configured, it was time to migrate the Kubernetes clusters. I had three:

    • Non-production (3 VMs)
    • Internal (8 VMs)
    • Production (5 VMs)

    The problem: Kubernetes nodes can’t easily change IP addresses. The IP is baked into etcd configuration, SSL certificates, and about seventeen other places. Changing IPs means major surgery with significant downtime risk.

    The Solution: Blue-green deployment, Kubernetes-style.

    1. Provision new nodes on VLAN 50
    2. Join them to the existing cluster (now you have old + new nodes)
    3. Drain workloads from old nodes to new nodes
    4. Remove old nodes from the cluster
    5. Delete old VMs

    No IP changes. No etcd reconfiguration. No downtime. Just gradual migration while workloads stay running.

    I started with the non-production cluster as a test. The entire migration took maybe 30 minutes, and the cluster never went offline. Workloads migrated seamlessly from old nodes to new nodes.

    As of today, I’m 1 cluster down, 2 to go. The non-production cluster has been running happily on VLAN 50 for a few hours with zero issues.

    What I Learned

    1. bridge-vids is a lie. Or rather, it’s not a lie—it just doesn’t do what you think it does. It configures bridge ports, not the bridge device. Always add explicit post-up commands for VLAN membership.
    2. Never restart networking on Proxmox with running VMs. Just don’t. Either shutdown VMs first, or reboot the whole host. Future you will thank past you.
    3. Blue-green migrations work brilliantly for Kubernetes. Provision new nodes, migrate workloads, remove old nodes. No downtime, no drama.
    4. Stop and start, never restart. When you change VM VLAN configuration, you need to stop the VM then start it. Restart doesn’t recreate the tap interface with new VLAN membership.
    5. Test on simple hosts first. I started with pmxdell (1 VM) before tackling pxhp (17 VMs). That saved me from debugging VLAN issues with production workloads running.

    The Current State

    Infrastructure migration progress:

    • ✅ Proxmox hosts: Both on VLAN 60 (Management)
    • ✅ Kubernetes (non-prod): 3 VMs on VLAN 50
    • ✅ Kubernetes (internal): 7 VMs on VLAN 50
    • ✅ Kubernetes (production): 5 VMs on VLAN 50

    Next steps: Monitor the clusters for 24-48 hours, then migrate internal cluster. Production cluster goes last because I’m not completely reckless.

    You’re missing an agent…

    The astute among you may notice that my internal cluster went from 8 nodes to 7. As I was cycling nodes, I took the time to check the resources on that cluster, and realized that some unrelated work to consolidate observability tools let me scale down to 4 agents. My clusters have started the year off right by losing a little weight.

    Part 3 of the home network rebuild series. Read Part 2: From “HideYoWifi” to “G-Unit”

  • From HideYoWifi to G-Unit

    From HideYoWifi to G-Unit

    A Story of SSID Consolidation and Zone-Based Security

    You know that moment when you’re explaining your home network to someone and you realize how ridiculous it sounds out loud? I had that moment when describing my SSID situation.

    “So I have HideYoWifi, SafetyInNumbers, StopLookingAtMeSwan, and DoIKnowYou

    The look on their face said it all.

    The SSID Situation

    After cleaning up my device inventory (goodbye, 17 identical ubuntu-server instances), I turned my attention to the wireless side of things. I had four SSIDs, all serving the same flat VLAN 1 network. The only difference between them was… well, there wasn’t really a difference. They were functionally identical.

    It was peak home network evolution: each SSID represented a moment in time when I thought “I’ll just create a new one for this use case” without ever deprecating the old ones.

    The Upgrade That Changed Everything

    My UCG Max supported zone-based firewalls, but I’d never enabled them. Why? Because zone-based firewalls are serious networking infrastructure, and I wasn’t sure I needed that level of complexity.

    Then I looked at my flat network with its 77 devices and zero segmentation, and I realized: I absolutely needed that level of complexity.

    On December 17th, I flipped the switch. The UCG Max upgraded to zone-based firewall mode, and suddenly I had the foundation for proper network segmentation. No more flat network. No more “everything can talk to everything” architecture. Just clean, policy-based isolation.

    The SSID Consolidation

    With zone-based firewalls enabled, having four identical SSIDs made even less sense. So I started the consolidation:

    • StopLookingAtMeSwan → Disabled (it had one device: a Blink connection module)
    • SafetyInNumbers → Merged into HideYoWifi (10 devices moved)
    • DoIKnowYou → Kept as guest network (zero devices, but useful for visitors)
    • HideYoWifi → Primary network (for now)

    With my new VLAN architecture, I didn’t want a single “primary” network anymore. I wanted purpose-built SSIDs for different device classes. That meant new SSIDs with actual meaningful names.

    Enter “G-Unit”

    I needed a naming scheme. Something memorable, professional enough for guests, but with personality. I considered:

    • “HomeNet-X” (too boring)
    • “TheSkynet” (too obvious)
    • “NetworkNotFound” (too clever by half)

    For obvious reasons, my family’s group chat name is “G-Unit.” Why not continue with that name?

    And you know what? It actually *worked* as a naming scheme.

    The New SSID Structure:

    • G-Unit → VLAN 10 (Trusted): Phones, laptops, work devices
    • G-Unit-IoT → VLAN 20 (IoT): Smart home devices, sensors, automation
    • G-Unit-Media → VLAN 40 (Media): Chromecasts, streaming devices, smart TVs
    • G-Unit-Guest → VLAN 99 (Guest): Isolated network for visitors

    Clean. Purposeful. Each SSID maps to a specific VLAN with specific firewall rules. No more “everything on VLAN 1” architecture.

    The Migration

    Between December 19th and 26th, I migrated 44 wireless devices across these new SSIDs. It was actually… smooth? Here’s why:

    I kept the old SSIDs running during the migration. Devices could join the new SSIDs at their convenience. No forced cutover. No mass outage. Just gradual, steady progress.

    The results:

    • December 19th: 24 of 41 devices migrated (59%)
    • December 19th evening: 36 of 41 devices migrated (88%)
    • December 26th: 44 of 44 devices migrated (100%)

    That last device? An iPhone that had been forgotten on the old SSID. Once it reconnected to G-Unit, I disabled HideYoWifi for good.

    The Zone-Based Firewall Magic

    With devices properly segmented, I could finally implement the security policies I’d been planning:

    IoT Zone (VLAN 20):

    • Can access Home Assistant (VLAN 60)
    • Can access internet
    • Cannot access file servers
    • Cannot access Proxmox infrastructure
    • Cannot access anything in Lab zone

    Media Zone (VLAN 40):

    • Can access NAS for media streaming (VLAN 60)
    • Can access internet
    • Cannot access IoT devices
    • Cannot access infrastructure

    Trusted Zone (VLAN 10):

    • Admin access to all zones (with logging)
    • Can manage infrastructure
    • Can access all services

    It’s beautiful. My Chromecast can stream from my NAS, but it can’t SSH into my Proxmox hosts. My smart plugs can talk to Home Assistant, but they can’t access my file server. Security through actual network isolation, not just hoping nothing bad happens.

    The Aftermath

    As of December 26th:

    – 100% of wireless devices migrated to zone-based VLANs

    – Zero devices on legacy SSIDs

    – 204 firewall policies actively enforcing isolation

    – Security score: 9.8/10 (up from 4/10 at the start)

    The flat network is dead. Long live the segmented network.

    What I Learned

    1. SSID consolidation is easier than you think. Keep old SSIDs running during migration. Let devices move at their own pace.
    2. Zone-based firewalls change everything. Once you have proper segmentation, you can actually enforce security policies instead of just hoping for the best.
    3. Naming matters. “G-Unit” is objectively ridiculous, but it’s memorable and tells a story. Sometimes that’s more important than being “professional.”
    4. Patience pays off. I could have forced a cutover in one evening. Instead, I spent a week doing gradual migration, and I had zero issues.

    Next up: The infrastructure migration. Proxmox hosts, Kubernetes clusters, and the moment I discovered that bridge-vids doesn’t do what I thought it did.

    Part 2 of the home network rebuild series. Read Part 1: The Accidental Network Archaeologist

  • The Accidental Network Archaeologist

    The Accidental Network Archaeologist

    Discovering 124 devices in my “simple” home network

    I thought I knew my home network. I had a router, some switches, a few VLANs that made sense at the time, and everything just… worked. Until the day I decided to actually document what I had.

    Turns out, I didn’t know my network at all.

    The Discovery

    I fired up the UniFi controller expecting to see maybe 40-50 devices. You know, the usual suspects: phones, laptops, smart home devices, maybe a few Raspberry Pis. The controller reported 124 active devices.

    *One hundred and twenty-four.*

    I immediately had questions. Important questions like “what the hell is ubuntu-server-17?” and “why do I have *seventeen* devices all named ubuntu-server?”

    The Forensics Begin

    Armed with an AI agent and a growing sense of dread, I started the archaeological dig. The results were… enlightening:

    The Good:

    • 5 security cameras actually recording to my NAS
    • A functioning Kubernetes cluster (three of them, actually)
    • Two Proxmox hosts quietly doing their job

    The Bad:

    • 17 identical ubuntu-server instances (spoiler: they were old SQL Server experiments)
    • Devices with names like Unknown-b0:8b:a8:40:16:b6 (which turned out to be my Levoit air purifier)
    • Four SSIDs serving the same flat network because… reasons?

    The Ugly:

    • Everything on VLAN 1
    • No segmentation whatsoever
    • My security cameras had full access to my file server
    • My IoT devices could theoretically SSH into my Proxmox hosts

    The Uncomfortable Truths

    I had built this network over years, making pragmatic decisions that made sense *at the time*. Need another VM? Spin it up on VLAN 1. New smart device? Connect it to the existing SSID. Another Raspberry Pi project? You guessed it—VLAN 1.

    The result was a flat network that looked like a child had organized my sock drawer: functional, but deeply concerning to anyone who knew what they were looking at.

    The Breaking Point

    Two things finally pushed me to action:

    1. The Device Census: After identifying and cleaning up the obvious cruft, I still had 77 active devices with zero network segmentation.

    2. The “What If” Scenario: What if one of my IoT devices got compromised? It would have unfettered access to everything. My NAS. My Proxmox hosts. My Kubernetes clusters. Everything.

    I couldn’t just clean up the device list and call it done. I needed actual network segmentation. Zone-based firewalls. The works.

    The Plan

    I decided on an 8-VLAN architecture:

    • VLAN 1: Management/Infrastructure (ProCurve, UCG Max, core gear)
    • VLAN 10: Trusted (my actual devices)
    • VLAN 20: IoT (smart home stuff that definitely shouldn’t access my files)
    • VLAN 30: Surveillance (cameras recording to NAS)
    • VLAN 40: Media (streaming devices, Chromecast, etc.)
    • VLAN 50: Lab (Kubernetes and experimental infrastructure)
    • VLAN 60: Services (NAS, Home Assistant, critical services)
    • VLAN 99: Guest (for when people visit and I don’t trust their devices)

    Conservative? Maybe. But after discovering 124 devices in what I thought was a “simple” network, I was ready to embrace some architectural paranoia.

    What’s Next

    The past few weeks have been interesting, and the plan is to document my migration over a few posts.

    • First: Immediate security wins (guest network isolation, device cleanup)
    • Second: VLAN infrastructure and zone-based firewall policies
    • Third: Device-by-device migration with minimal disruption
    • Fourth: The scary part—migrating my Kubernetes clusters without breaking everything

    I’ll be documenting the journey here, including the inevitable mistakes, late-night troubleshooting sessions, and that special moment when you realize you’ve locked yourself out of your own network.

    Because if there’s one thing I’ve learned from this experience, it’s that home networks are never as simple as you think they are.

    This is Part 1 of a series on rebuilding my home network from the ground up. Next up: Why “G-Unit” became my SSID naming scheme, and how zone-based firewalls changed everything.